What Is Silver Clay? The Complete Beginner's Guide
By William, SILVERCRAFT co-founder | 7 min read | Updated July 2026
Someone handed me a finished silver ring once and asked me to guess how it was made. I said the usual things: fabricated, cast, maybe stamped. All wrong. She'd made it that morning at her kitchen table using something that looked like grey Play-Doh and a torch. I didn't believe her until she showed me the before photo.
Silver clay. I'd heard of it but I'd written it off as a craft thing, not serious jewelry-making. That assumption was wrong.
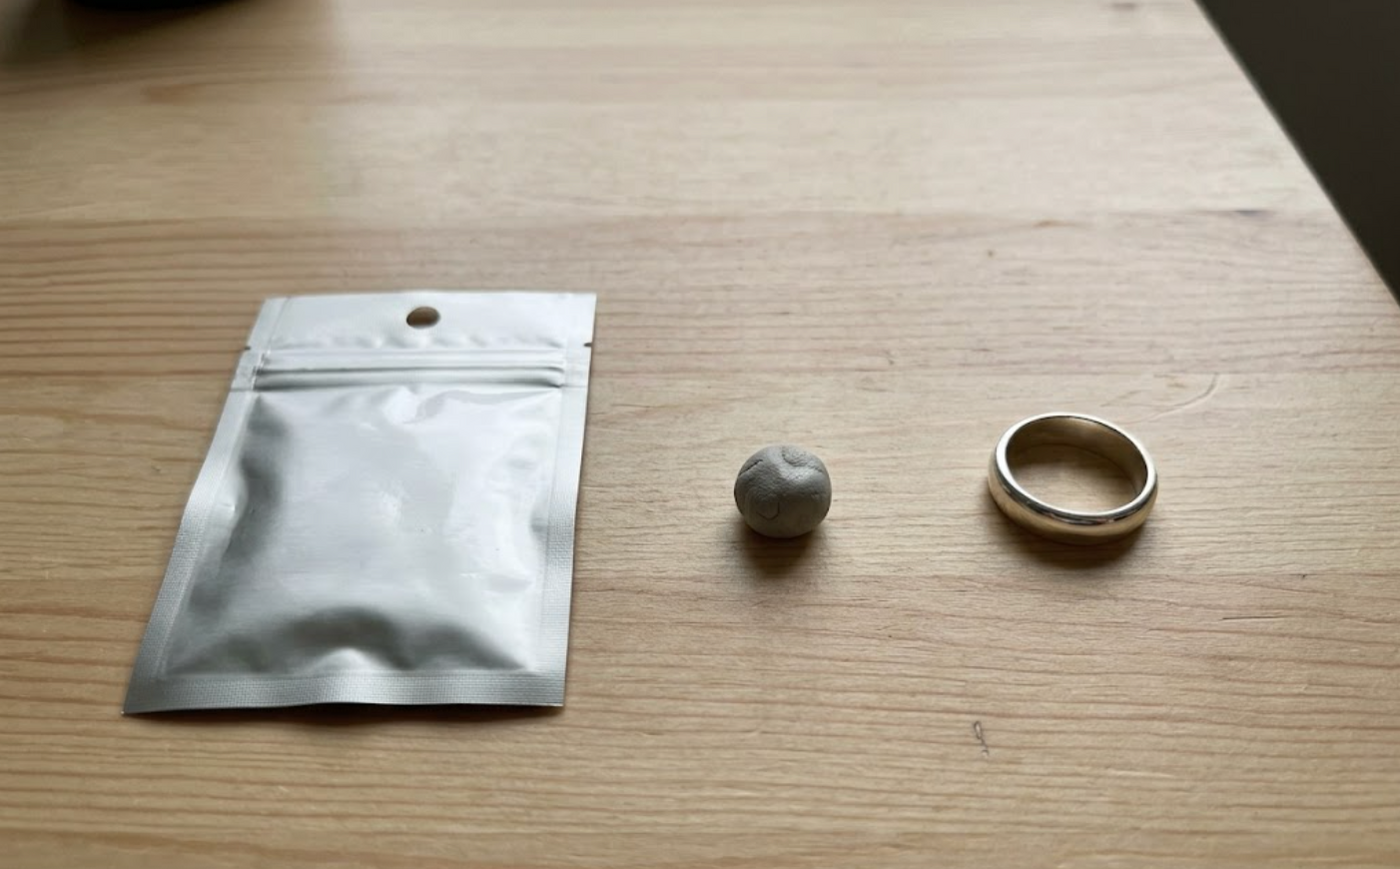
What silver clay actually is: fine silver particles (the real thing, 99.9% pure) mixed with water and an organic binder that holds it together while you work. You shape it, dry it, fire it with a butane torch, and the binder burns off completely. What's left is solid fine silver. Not plated, not coated. The clay was always the silver. You just gave it a form.
I'm writing this because we get a lot of questions from people who've seen silver clay on TikTok or heard about it from a friend and want to know if it's actually real or some kind of gimmick. It's real. Let me walk you through it properly.
What is silver clay
The technical name for the process that makes it work is sintering. When metal particles get hot enough, they bond at a molecular level without fully melting. That's how the binder burns away and the silver stays behind as solid metal. It sounds complicated but the practical reality is: you shape something, you torch it for a few minutes, and it becomes silver. That's the whole trick.
There are other metal clay products out there. Copper clay is cheap but needs kiln-firing in an oxygen-free environment to work properly. A torch alone won't do it, and the results with a torch are unreliable at best. Gold clay exists and works beautifully but the material cost is significant. Silver is the one that fires cleanly with a butane torch, shrinks predictably, and gives beginners consistent results. We're planning to add copper and gold options to SILVERCRAFT eventually. For now, silver is the right place to start.
Is it actually real silver
Every time I mention silver clay to someone new, there's this pause while they decide whether I'm trying to sell them something that sounds like silver but isn't. So let me be direct.
After firing: 99.9% fine silver. Same purity as fine silver bullion. Not .925 sterling (that's 92.5% silver alloyed with copper). Not plated. Not silver-look-alike. The ring you make with the RingLab kit has the same material as a fine silver piece from a jewelry store.
Fine silver is actually purer than sterling, which surprises people. It's also softer, because sterling's hardness comes from the copper. For a thin ring band, that means it can bend under hard impact. A band that's 3mm or wider wears fine daily. Pendants and earrings, no issue at all.
One real benefit of fine silver that doesn't get mentioned enough: it's hypoallergenic. No copper, no reactions. People who can't wear most commercial jewelry wear fine silver without problems.
The process, honestly
You shape the clay while it's wet, on the acrylic plate that comes in the kit. You have about 15 minutes before it starts drying. Put a little oil on your fingers before you start, it stops the clay sticking to you and tearing at the surface. Keep the part you're not working with inside the plastic wrap. If the edges start to crack, a drop of water on your fingertip and 30 seconds of kneading fixes it. If the shape goes wrong, rewet and start over. The clay doesn't care. It's forgiving until it's dry.
Then you dry it. This is the step that catches people. It needs to be dry all the way through, not just on the surface. If there's moisture inside when you fire it, that moisture becomes steam and the steam cracks the piece. Every single time. It's not a technique issue, it's physics.
The tap test: tap the piece lightly. A dry piece sounds hard and gives nothing. Any softness means it's not ready. This takes a second and is the single most useful thing in this guide.
Leave it on the mandrel for 20 to 25 minutes, then twist it off gently and let it dry right through on the ceramic firing platform, up to an hour. A hair dryer on warm speeds it up.
Firing: set the piece flat on the ceramic firing platform, torch in small circles with the tip of the blue cone about 3/4 inch (2 cm) away, wait for an even orange-red glow across the whole surface, hold 7 minutes, done. The piece comes out white. Not grey, white. That's not a problem, that's what's supposed to happen. It's a thin layer of oxidized silver that forms as it cools. Brush it with the wire brush and real silver appears underneath.
Then you sand. Work the sanding papers from coarsest to finest. The more you work it, the smoother and brighter it gets, so you stop when you like how it looks. If you have a textured piece, sand only the raised surfaces and leave the recessed areas matte. It looks much better than if you sand everything flat.
Full firing guide: How to Fire Silver Clay at Home (No Kiln Needed)
What you can make
Rings. That's where almost everyone starts and honestly it's the right call. The one thing you need to know about rings specifically is that silver clay shrinks about 12% when it fires. A ring shaped at size 10 comes out around a size 7. You account for this by always shaping three full sizes larger than your target. The ring sizer in the kit helps you find your starting point before you touch the clay.
Beyond rings, pendants and earrings both work with the same clay and the same process. The nice thing about pendants especially is that you don't have the sizing calculation to worry about. Roll, cut, press a texture in if you want, punch a hole for a bail, fire.
The texture thing deserves a mention. Press almost anything into wet silver clay and it transfers beautifully. Lace, a coin, an actual leaf from the garden, the bottom of a ring you own. One woman in our early test sessions pressed a piece of mesh from a kitchen strainer and the result looked like something from a jewelry shop. She'd never made jewelry before in her life.
The Duo kit is two clay packs in one box, enough for two people to each make a ring in the same session. Couples do it, friends do it, mothers and daughters. It's one of those activities that sounds simple and turns out to be the part of the evening you actually remember.
About the 'I'm not crafty' thing
Half the people who try this kit tell us beforehand that they're not crafty. I've stopped arguing with them and just let them try it.
Where people actually have trouble: the drying step, as I said above. And ring size. In our test sessions, a few people shaped their rings at the right size mark on the mandrel but forgot that silver clay shrinks. They ended up with rings three sizes too small. The fix is simple once you know about it. Just annoying to discover after.
The shaping part? Fine. The firing? Easier than it looks. The moment that I didn't expect when we were testing: how quiet the room got when people wire-brushed their piece for the first time and silver came through. Every single time. Nobody warned me that would be the memorable part.
A word on safety
The binder that burns off during firing produces some smoke in the first 30 seconds. It's not toxic (plant-based), but breathing it in is still not a great idea. Open a window. That's all.
When you sand the fired ring, fine silver particles go into the air. For occasional home use this is not a serious concern. Sand gently, wash your hands, maybe open a window. If you do this regularly, a basic dust mask makes sense.
The torch: same as any butane torch you'd use in a kitchen. Point away from people and flammable things, don't leave it on unattended, and fire on the ceramic platform rather than straight onto a counter. There's nothing exotic here.
One thing that doesn't apply to silver clay but is worth knowing anyway: copper clay can cause skin reactions in people with copper sensitivity. Silver clay is 99.9% fine silver, no copper. Not an issue here.
Tools you actually need

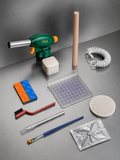
The full list is shorter than people expect. You need the clay itself (5g for one ring), a ring sizer, a wooden ring mandrel (wooden specifically, metal conducts heat wrong), an acrylic plate to roll on, a craft knife, a paint brush to wet the join, a wire brush, sanding papers from coarse to fine, a ceramic firing platform to fire on, and a butane torch head.
The one thing that gets cut from cheap kits most often is the firing surface. You need something that can take around 1300°F while you hold a torch on it, and in our kit that's a ceramic firing platform you set the ring flat on. It costs almost nothing to include. When it's missing, the instructions send you off to buy a tile before you can even start, and that's usually a sign the rest of the kit isn't great either.
The RingLab kit has all of this. Both of our silver clay kits carry the same kind of tools. The Duo doubles the clay and adds a second mandrel and acrylic plate, so two people can shape side by side. The only thing not included is the butane canister (can't be shipped by most carriers). Hardware store, $3 to $5.
Things people ask me
Is it the same as PMC? PMC is a brand name for silver clay, invented by Mitsubishi in Japan in the 1990s. Art Clay Silver is another brand. They're all the same category of product. The differences that matter in practice come down to firing temperature and shrinkage rate.
Do you really not need a kiln? For torch-fireable silver clay, no. A butane torch does the job. Sterling silver clay (92.5%, alloy) does need a kiln because the copper in the alloy changes the firing requirements. Fine silver clay doesn't have that issue.
What if you over-fire it? Fine silver melts at around 1762°F. With a normal butane torch and slow circular movements, you'd have to actively try to get there. If the piece glows yellow-white instead of orange-red, pull the flame back. Slight over-fire: rough surface. Serious over-fire: rounded edges. Neither is common if you follow the firing guide.
Can I sell what I make? Yes. Fine silver jewelry. Check your local rules around hallmarking if you're selling professionally, but the material itself is completely legitimate.
How long does the clay stay workable once I open the packet? About 15 minutes before it starts drying out on the surface. Keep unused clay wrapped in plastic. A few drops of water and a minute of kneading brings it back if it dries between sessions.
Our silver clay kits have everything in this guide. One butane canister from the hardware store and you're set. Free standard shipping, duties paid.
Read next
How to Fire Silver Clay at Home (No Kiln Needed)
How Much Silver Clay Do I Need for a Ring?
The Best At-Home Date Night Idea (That Actually Produces Something)
- William, SILVERCRAFT co-founder
ready to make your own?
Everything you need in one box. Shape it, fire it, wear 99.9% fine silver.
Shop the kits →