How to Fire Silver Clay at Home (No Kiln Needed)
By William, SILVERCRAFT co-founder | 8 min read | Updated June 2026
I still remember the first time I fired a piece of silver clay. Honestly? I was nervous. I had my torch in hand, my firing platform set up on the kitchen counter, and I had no idea if anything was actually going to happen.
Then the glow appeared.
That warm orange-red across the whole surface, the smoke from the binder burning off, and then: silence. A few minutes later, I was holding a real piece of fine silver I'd made myself. That feeling never gets old, and it's exactly why we built SILVERCRAFT.
So let me walk you through the firing step the way I wish someone had walked me through it. No jargon, no assumptions, just what you actually need to know.
What you need before firing: dry silver clay ring or piece, butane torch (head + gas canister), the ceramic firing platform from your kit, small bowl of water nearby, ventilated room.
Why silver clay needs heat
Silver clay is 99.9% fine silver particles held together with water and an organic binder. At room temperature it behaves like soft clay. When you heat it to around 1300°F (700°C), the binder burns away and the silver particles fuse together (that's called sintering) and you get solid metal. The same process jewellers use in professional studios, in your kitchen.
The white chalky look before firing? That's the binder. After firing, the white surface you see is actually fine silver that just hasn't been polished yet. The metal underneath is fully formed and real.
A butane torch reaches 2,500°F, well above what silver clay needs. The trick isn't getting hot enough. It's staying at the right temperature consistently for long enough. That's what this guide is for.
Set up your firing station

Get this right before you light anything. Rushing the setup is how accidents happen, and also how pieces get ruined.
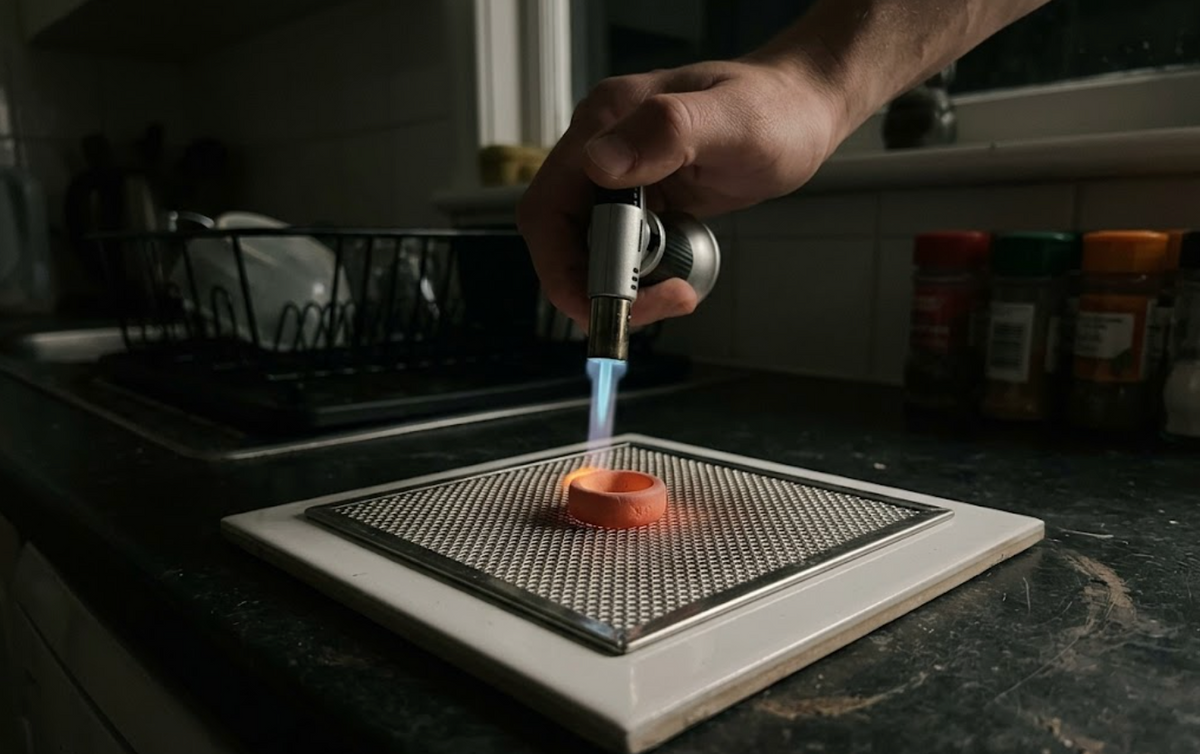
Put the ceramic firing platform on a stable, level surface. A kitchen counter is perfectly fine as long as you're not directly under hanging cabinets. The platform is what takes the heat, which is why it comes in the box. You don't need to go find a tile or a firebrick.
Place your dry silver clay piece flat on the platform, closer to the middle than to an edge. A ring should have the band lying flat, not tilted to one side.
Open a window or turn on a fan. During the first 15-30 seconds of firing, the binders produce a small amount of smoke. Nothing toxic, but ventilation is always a good idea.
Set a small bowl of water within arm's reach. You probably won't need it, but it should be there.
Don't improvise a firing surface. Aluminum foil melts. Baking racks warp. Glass can shatter from thermal shock. The ceramic firing platform is in the kit for exactly this reason. If you ever need to replace it, a plain ceramic tile or a firebrick does the same job for about a dollar.
How to use a butane torch for silver clay
Screw the torch head onto your butane canister and check it is properly seated before you light it. Always test the ignition before you move near your piece.
Flame distance and movement. Hold the torch so the tip of the blue cone is about 3/4 inch (2 cm) from the piece. Move it in slow, continuous circles, never stop in one spot. Stationary heat causes hot spots that can crack your piece or, in extreme cases, start to melt a thin edge.
Think of it like heating a pan evenly. You want the whole piece at temperature together, not one section roasting while the other stays cold.
The firing sequence, step by step
Light the torch and start moving it in circles above the piece immediately.
In the first 15 to 30 seconds, you'll see smoke. That's just the binders burning off. Keep the flame moving, don't pull back.
The piece will start to glow. You're looking for an even orange-red across the entire surface. Not bright orange. Not yellow-white. Even orange-red.
Once you see that glow, start a timer. Maintain it for 7 minutes.
After 7 minutes, remove the flame and safely set the torch down with the flame off.
Leave the piece on the platform for 10 minutes. It holds heat much longer than it looks like it does. Trust me on this one.
| What you see | What it means | What to do |
|---|---|---|
| Smoke (first 30 sec) | Binders burning off, totally normal | Keep going, don't pull back |
| Dull orange-red glow | Correct firing temperature | Start your 7-minute timer |
| Bright orange / yellow-white | Too hot, risk of melting | Pull the flame back a little |
| No glow after 60 sec | Not hot enough | Bring the flame a little closer |
| Uneven glow | Moving too fast or too slow | Adjust your circle speed |
| Piece cracks mid-firing | Residual moisture inside | Stop, re-dry 30 min, try again |
How long to fire silver clay
The standard for a ring made from 5g of silver clay is 7 minutes at firing temperature, meaning 7 minutes after you reach that even orange-red glow, not 7 minutes from when you first light the torch.
Thicker pieces take longer to reach the glow, but once they are there the 7 minutes stays the same. The glow color will tell you more than anything else whether you are at temperature.
My tip: the glow is your guide, not the clock. If you're maintaining an even orange-red, you're firing correctly. A piece that glows evenly for 7 minutes is fully sintered, regardless of whether your timer hit exactly 7:00. And if you're not sure? An extra minute won't hurt.
After firing: what you'll see

When you remove the flame, the piece looks white. This surprises almost everyone the first time. It looks like nothing happened. I promise it did.
That white surface is a thin layer of fine silver that oxidizes during cooling. The metal underneath is fully sintered and solid. You're minutes away from your finished piece.
Leave it alone for 10 minutes. Pick it up with metal tongs, or wait until you can comfortably touch the platform with the back of your hand.
Finishing after firing: two steps

Wire brush first, then sanding papers. In that order. Don't skip either.
Wire brush. Scrub the entire surface with firm, short strokes. The white coating comes off quickly and reveals a matte silver underneath. Get every surface, including the inside of a ring band. Keep brushing until the shine is where you like it.
Sanding papers. Work them from coarsest to finest. The more you work the ring, the smoother and brighter it gets. Stop when you like how it looks.
One thing I love doing: on a textured ring, I leave the recessed areas matte and only sand the raised surfaces. The contrast makes the texture pop in a way that looks really intentional.
The two mistakes that cause problems
I've made both of these. So have most people. Here's how to avoid them.
Firing before the clay is fully dry. Moisture trapped inside the clay turns to steam when heated. Steam has nowhere to go. The piece cracks. This is the most common reason for broken rings, and it's completely preventable.
Quick test: tap the piece lightly. A dry piece sounds hard and gives nothing. If there is any softness, it needs more drying time, because water trapped inside turns to steam in the fire. Hard and solid, you're ready to fire.
Stopping the flame too early. 7 minutes at firing temperature means 7 minutes of glow, not 7 minutes of torch time total. If you pull the flame the moment you see orange, the outer layer may sinter while the core doesn't fully fuse. The ring looks finished but can feel slightly fragile.
Keep the glow going for the full time. It's worth it.
Frequently asked questions
Can you fire silver clay with a regular lighter? No. A lighter doesn't get hot enough or stay hot enough. A butane torch reaches 2,500°F, a lighter tops out around 450°F. Use a proper torch.
Can you fire silver clay in the oven? A standard kitchen oven can't reach sintering temperature. Some manufacturers make low-fire formulas for specialty ovens, but standard silver clay needs a torch or kiln.
Can you fire silver clay in the microwave? No. Microwaves heat by vibrating water molecules, the opposite of what sintering needs. Don't try it.
How do you know when silver clay is done firing? Even orange-red glow maintained for 7 minutes. If you're unsure, an extra minute won't hurt. Underfiring is a much bigger problem than slight overfiring for most beginner pieces.
Can you refire silver clay? Yes. If a piece looks underfired, or if you repaired a crack with fresh clay, you can re-dry and refire. The silver handles multiple firings without damage.
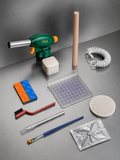
Ready to make your first ring? The RingLab Silver Clay Kit has everything in this guide: butane torch head, ceramic firing platform, and all the shaping tools. You provide the butane canister (any hardware store, $3-5). Everything else ships straight to your door, with free standard shipping and duties paid.
Read next
What Is Silver Clay? The Complete Beginner's Guide
How Much Silver Clay Do I Need for a Ring?
Silver Clay Troubleshooting: Dried Out, Cracking, Won't Fire?
- William, SILVERCRAFT co-founder
ready to make your own?
Everything you need in one box. Shape it, fire it, wear 99.9% fine silver.
Shop the kits →