Silver Clay Kit for Beginners: What to Look For
I've looked at a lot of silver clay kits. Some of them while building RingLab, some of them before that, out of curiosity about what else was available. The quality range is wider than I expected. A few kits are genuinely well put together. A lot of them are missing one or two things that seem minor but actually make the difference between a session that works and one that doesn't.
This is what I'd look for if I were buying a silver clay kit for the first time and didn't want to figure it out the hard way.
What a kit actually needs to have
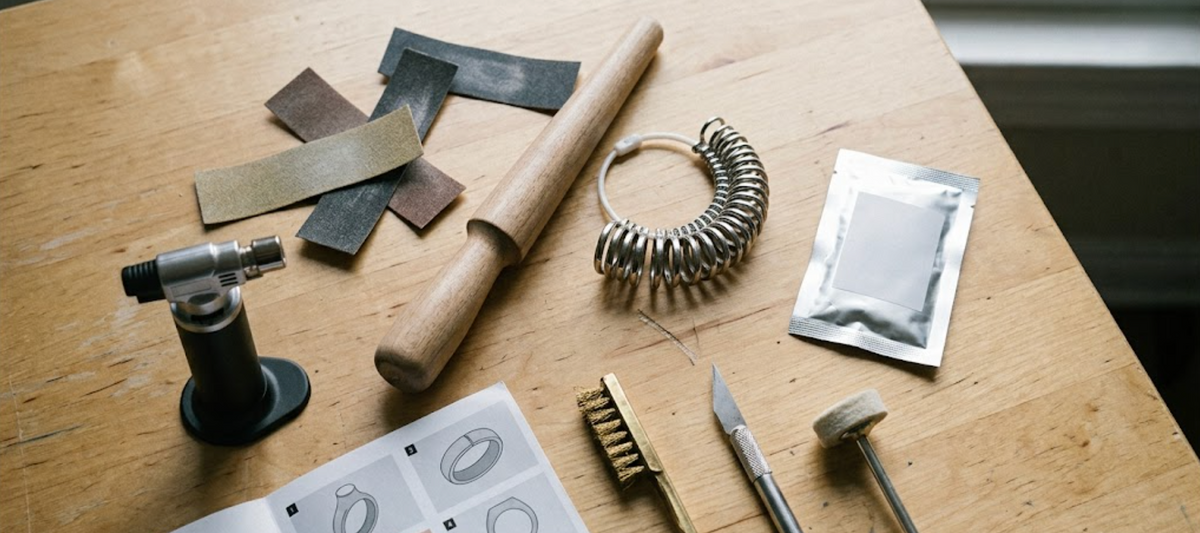
The non-negotiables: the clay itself, a ring sizer, a wooden ring mandrel, an acrylic plate to roll on, a craft knife, a paint brush, a wire brush, sanding papers, a ceramic firing platform to fire on, a torch head, and instructions that tell you the firing specs for the specific clay in the kit.
That last part matters more than the tool list. Silver clay from different brands fires at different temperatures for different durations. Generic instructions that say "fire until glowing" are not instructions. They're a guess. A good kit tells you the exact clay you're using and exactly how to fire it. Ours says 7 minutes at an even orange-red glow, and it says why.
The clay
For a beginner, torch-fireable fine silver clay is what you want. .999 purity, organic binder, fires with a standard butane torch. No kiln required.
Check the shrinkage rate. It should be stated somewhere in the kit or on the manufacturer's website. Ours is about 12%. What matters is that the instructions in the kit account for it with specific ring sizing guidance. "Account for shrinkage" with no numbers is not guidance. A number you can act on looks like this: shape three full sizes above your target.
The clay should be packaged airtight. If it arrives dried out or cracked, that's a supply chain problem and the kit isn't worth the price. A small amount of surface dryness on an otherwise pliable piece is normal and fixable with a few drops of water. Hard all the way through is not.
The firing surface
This is the item cheap kits cut most often, and it's the one I'd check for before buying.
You fire silver clay with an open flame, so the piece has to sit on something that can take around 1300°F without cracking, scorching, or passing the heat straight into your kitchen counter. A kit that's been thought through gives you that surface. Ours is a ceramic firing platform: you set the ring flat on it, you fire, and the platform takes the heat.
It costs almost nothing to include. When a kit doesn't have one, the instructions quietly tell you to go and buy a ceramic tile or a firebrick, usually in a single line near the bottom of the page. Which means your first session is blocked until you make a trip to the hardware store, on a product sold as complete. That's not a substitution. That's an omission with a note attached.
Check what you are meant to fire on before buying. If the kit doesn't include a firing surface, the instructions will send you to a hardware store before you can start.
The mandrel
The mandrel is the tapered rod you shape the ring around. It must be wooden.
A metal mandrel conducts heat. When you fire the ring on or near a metal mandrel, the heat distribution changes and the clay can fire unevenly or crack where it contacts the metal. Wooden mandrels don't conduct heat the same way. They're also cheaper to produce, which makes it more annoying when a kit includes a metal one: it's not even a cost-cutting choice, it's just wrong.
The mandrel should have ring sizes marked on it clearly. If the markings are vague or missing, you're guessing at your target size, which defeats the purpose.
The ring sizer
A ring sizer is a set of sample rings in graduated sizes. You try them on until you find the one that fits, and that gives you your starting size before you adjust upward for shrinkage.
Some kits include a paper or plastic ring sizer strip instead of proper sample rings. These work acceptably but are less accurate than physical rings, especially for people whose finger size varies between joints. A proper ring sizer set is better.
Without a ring sizer of some kind, you're measuring your finger with a string and a ruler and converting to a ring size chart. This works but introduces more error. In a beginner kit, every extra step that requires outside knowledge is a chance for a wrong ring size.
The instructions
Good instructions for a silver clay kit tell you three things specifically: the clay type and its firing temperature, the duration, and how many sizes up to shape the ring to account for that clay's shrinkage.
Generic instructions that apply to "silver clay" in general are better than nothing but worse than clay-specific guidance. If the kit doesn't name the clay brand or specs, and the instructions say things like "fire at medium torch setting," the kit is making you work harder than you need to.
A step-by-step online guide with video is a real asset, especially for the firing step. Reading about the orange-red glow is less useful than seeing it once. Kits that include a video reference for that moment have thought about what actually helps a beginner succeed.
What cheap kits cut
The firing surface, almost always. The ring sizer, sometimes replaced with a paper strip. The wooden mandrel, sometimes replaced with metal. The clay quantity: some kits include 3g when 5g is the minimum for a standard ring. The instructions: generic or missing entirely.
None of these substitutions are invisible. You notice the firing surface when your ring is dry and ready and you realize you have nothing safe to put it on. You notice the clay quantity when you run out before the join is closed. You notice the instructions when the ring comes out three sizes small and nobody warned you about shrinkage.
A kit priced significantly below the market average for silver clay kits is almost always missing something. Silver clay is not cheap material. The clay cost alone puts a floor on what a complete kit can cost while still containing enough of it to be useful.
How much clay is enough
Five grams is the minimum for a single ring with a 3mm to 4mm band. You'll have a small amount left over, but not much margin for error. Kits with 3g of clay are tight for a standard ring and leave you nothing for a second attempt if something goes wrong.
More clay gives you more breathing room. Enough for a ring plus a small pendant, or two thin stacking rings, or one ring with a comfortable buffer for mistakes. If you're buying for someone who's never done this before, more clay is more forgiving.
Two people making rings together need two separate packs. That's what the Duo kit covers: 2x5g, one per person, one session.
Minimum for one ring: 5g. Two people means two packs. The Duo kit: 2x5g in one box.
What you don't need
A kiln. Torch-fireable silver clay fires with a standard butane torch from the hardware store. Any kit that requires a kiln is not a beginner home kit.
Professional jewelry tools. A little oil for your fingers and a small cup of water for the clay, and that's it beyond the box. A complete kit already gives you the surface you roll on and the platform you fire on. If a kit listing mentions a dozen additional tools you need to buy separately, the kit is incomplete.
Experience. The whole point of a well-designed kit is that you shouldn't need prior knowledge to use it. If the instructions assume you already know how silver clay fires, or what shrinkage means for ring sizing, or how to identify the right glow, those are things the kit should have told you.
Our silver clay kits have everything on this list. The Solo covers one person, the Duo carries twice the clay for two. One butane canister from the hardware store and you're set. Free standard shipping, duties paid.
ready to make your own?
Everything you need in one box. Shape it, fire it, wear 99.9% fine silver.
Shop the kits →