15 Silver Clay Jewelry Ideas for Beginners
Most people who pick up silver clay for the first time already have something specific in mind. A ring, usually. Sometimes a pendant they saw on someone's neck and couldn't find anywhere to buy. Sometimes nothing specific, just a general sense that they want to make something and silver clay seemed like the right place to start.
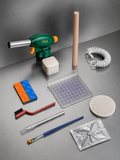
This list covers fifteen things you can actually make at home with silver clay, a butane torch, and the tools in the RingLab kit. I've organized it roughly by difficulty, starting with what I'd recommend for a first session and working toward the stuff that's more interesting once you know what you're doing. None of it requires a kiln.
Start with rings

1. Plain band ring
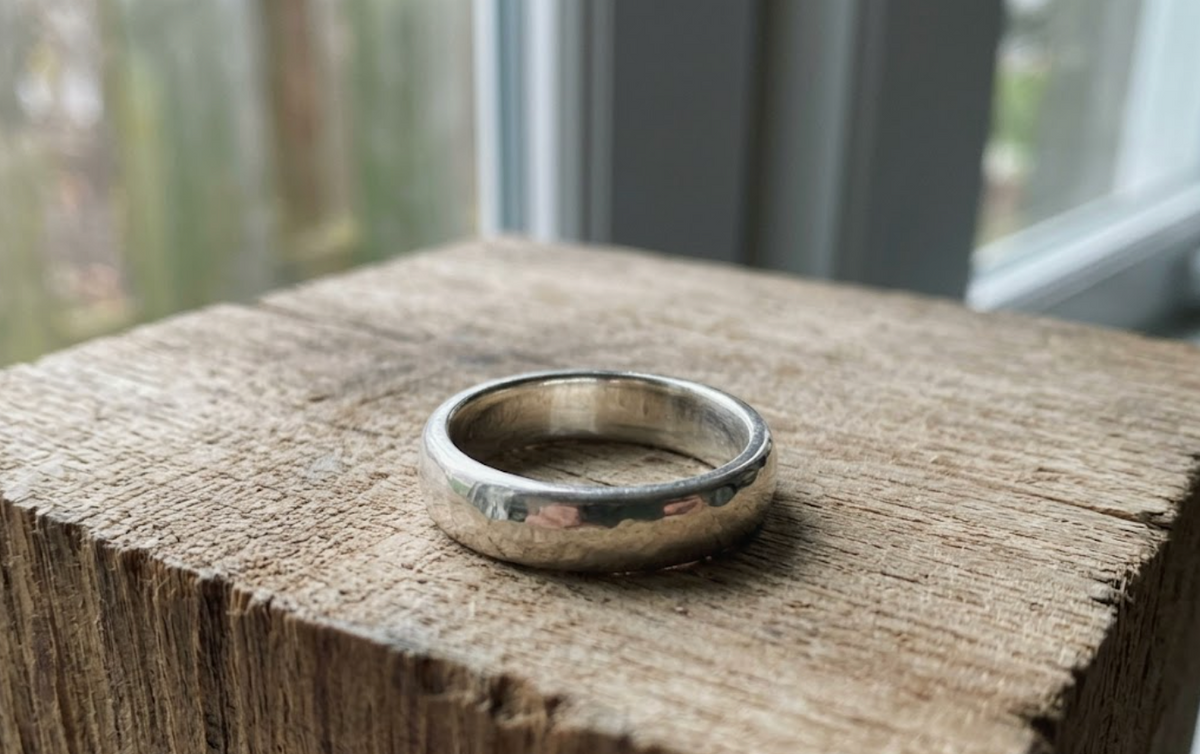
This is where almost everyone starts and it's the right call. A plain band is forgiving: one piece of clay, one join, nothing that can go wrong except the join itself. You learn the shaping, the drying, the firing, and the finishing all in one session. If I were teaching someone silver clay in person, this is what I'd have them make first. Not because it's the most interesting project but because getting it right teaches you everything you need for the rest of the list.
2. Textured band ring
Same process as the plain band, except you press something into the wet clay before it dries. A coin, a piece of lace, the side of a pencil, the bottom of a ring you already own. The texture transfers beautifully and the finished ring looks like it took significantly more skill than it did. One thing worth knowing: the texture deepens slightly during firing as the clay compresses. If you want a subtle texture, press lightly. If you want it to really show, press harder than you think you need to.
3. Stacking ring
A stacking ring is just a thinner version of the plain band, usually 2mm or 2.5mm wide. You make two or three and wear them together. The trickier part is making them consistent enough that they sit flush against each other when stacked. They don't have to be identical, and honestly a small amount of variation looks better than perfect uniformity. Uses less clay per ring, which means you can get multiple rings from one pack if you're careful.
4. Initial ring
A ring with a single letter on the face. You scratch the letter into the clay with the craft knife while it's still on the mandrel, working slowly with light passes. Deep enough to read clearly after sanding, not so deep that you compromise the thickness of the band. Takes about five minutes to carve once you're comfortable with the knife. Popular as a gift for obvious reasons.
Ring sizing reminder: always shape 3 sizes up from your target. Silver clay shrinks about 12% when it fires, so a size 7 finger means shaping at the size 10 mark.
Pendants are easier than they look
Pendants have one significant advantage over rings: no sizing calculation. You don't have to account for shrinkage in the same way because you're not fitting it to a finger. Roll the clay, shape it, punch a hole for the bail, fire it. The hole for the bail needs to be big enough that after about 12% shrinkage your chain still fits through. Make it bigger than you think you need.
5. Simple geometric pendant
Circle, square, teardrop. Cut the shape from a rolled sheet of clay using the craft knife or a small cutter. Punch a hole near one edge. Done.
The simplicity is the point. Fine silver has a warmth and weight that inexpensive geometric jewelry doesn't. A plain circle pendant in fine silver sits differently on the neck than the same shape in brass or sterling. People who make these often end up making several in different sizes and wearing them layered.
6. Leaf pendant
Press a real leaf into a rolled sheet of clay. Cut around it leaving a small border, punch a hole, fire. The leaf burns off completely during firing and what's left is an exact silver impression of the veins and texture. Works best with leaves that have pronounced veins. Fern, maple, oak. Smooth leaves don't give you much.
7. Coin impression pendant
Press a coin into the clay, cut a circle around the impression, punch a bail hole. Old coins work better than new ones because the relief is usually higher. A worn coin gives a more interesting result than a mint one. If the impression seems shallow before firing, it'll sharpen up once the clay compresses. Trust the process.
8. Name or word pendant
Stamp or carve a word into the clay. Letter stamps designed for metal clay are the cleanest way to do this, but you can carve with the craft knife if your lettering is steady. Short words work better than long ones. One woman in our test sessions made a pendant with her daughter's name on it during the session and had it on a chain before she left. That's about as direct as gift-making gets.
Earrings
Earrings use very little clay. A pair of small studs might use 1.5 to 2 grams total. This makes them a good use of leftover clay after a ring session.
9. Stud earrings
Roll two small balls of clay, flatten them slightly, fire them. After sanding, attach earring posts with jewelry adhesive. The key is making both studs close to the same size. Weigh the clay portions before rolling if you want them to match closely. A small difference is barely noticeable when worn. A large difference is.
10. Textured disc earrings
Cut two matching circles from a rolled sheet of clay and press the same texture into both. The challenge is consistency. Use the same pressure, the same object, the same angle on both pieces. Fire them on the ceramic firing platform with enough space between them that the heat reaches both evenly. Attach ear wires after sanding.
Things with texture
Texture is where silver clay gets genuinely interesting. The material picks up detail that you can't achieve with most other accessible jewelry-making methods. I've seen pieces come out of test sessions that looked like they required equipment and training that nobody in the room had.
11. Mesh or lace texture piece
Press fabric mesh or a piece of lace into a rolled clay sheet. Cut your shape, punch a bail hole if it's a pendant, fire. The mesh from a kitchen strainer gives a uniform grid that looks almost industrial. Lace gives something more organic. Both read as intentional design choices, not beginner experiments.
12. Bark or wood grain texture ring
Press the clay against a piece of rough bark or weathered wood. Roll it over a slightly textured surface. The grain transfers with more detail than you expect. Looks good on a wider band, 4mm or more, where the texture has room to read.
13. Fingerprint ring or pendant
Press a fingertip into the surface of the wet clay. The ridge detail of a fingerprint fires beautifully. You can do your own fingerprint or someone else's. People make these for partners. Parents make them with their kids' fingerprints. It's the kind of thing that sounds sentimental and then turns out to be genuinely affecting when you hold the finished piece.
A few ideas for later
These take a bit more clay or a bit more patience. Not dramatically harder, just better suited to a second or third session when you know how the clay behaves.
14. Set stone ring
Press a gemstone into the wet clay band before firing. The stone needs to be lab-grown or a natural stone rated as kiln-safe or torch-safe. Most cubic zirconia and synthetic stones are fine, many natural stones are not. Build up a collar of clay around the setting so there's enough material to hold the stone after the ring shrinks. Budget about half a gram extra. The stone stays in place through firing and gets finished as part of the ring. Both kit pages have a gemstone pack you can switch on if you would rather not source your own.
15. Matched pair: rings for two people
Make two rings in one session, one for each person. They don't have to match. Same clay, same torch, same evening. This is what the Duo kit is designed for. Couples do it on date nights. Friends do it. Mothers and daughters. The experience of making something together and wearing it afterward is a different thing from making it alone. I've watched it happen enough times now that I stop being surprised by it, but I'm not quite used to it.
What to do with the scraps
After any of the projects above, you'll have clay scraps. Wrap them tight in plastic. They keep. If they dry out, a few drops of water and some kneading bring them back. Even the sanding dust is worth keeping: mix it with water drops into a paste for filling cracks and patching joins.
The projects that use the least clay are the studs and the stacking rings. If you've finished a ring and have 1.5 grams left, that's a pair of small studs. Nothing gets wasted if you don't let it.
The RingLab kit has 5g of clay, enough for a ring and most of the projects on this list. The Duo kit has 10g total (2x5g). Free standard shipping, duties paid.
ready to make your own?
Everything you need in one box. Shape it, fire it, wear 99.9% fine silver.
Shop the kits →